Are you curious about what Capture One can offer you as a food photographer? Are you a Lightroom user who loves the program but are unsatisfied with the tethering performance?
Or maybe you’ve been considering making the switch to Capture One but are on the fence about learning yet another software program. I mean, Photoshop alone is a mountain to climb, right?
Well, read on about some of the key features of Capture One Pro.
Hopefully this post will help you make up your mind about whether or not this RAW editor is for you.
What is Capture One Pro?
Capture One was developed by Phase One, a Danish manufacturer of medium format cameras. The software was developed as a front-end solution for commercial studio photographers using their cameras, so the focus has always been on RAW conversion, state-of-the art tethered capture, and extensive adjustment tools, as well as powerful digital asset management.
Note that in this post when I talk about Capture One, I’m referring to Capture One Pro, which is the version of the program that I recommend. Capture One Express doesn’t come with all the features that Capture One Pro offers and that would benefit you as a food photographer.
Because it’s a RAW convertor, comparisons between Capture One and Lightroom are to be expected, but Capture One caters to a specific segment of the market.
Lightroom is definitely the more widely used and popular program, but Capture One really shines in a studio environment and is a perfect solution for still life photography.
Lightroom and Photoshop use Camera Raw, while Capture One has its own unique processing engine that use profiles calibrated to each camera it supports.
Therefore, the sharpness, contrast, color rendition that you get out of your photos is objectively better than what you’ll get out of other RAW editors.
Color in Capture One Pro
In Capture One, the colors already look pretty amazing and life-like upon import without any additional interpretation.
Now, some photographers prefer how their images look in Lightroom. Because of the way Capture One builds color profiles, the camera you’re using has a big influence on your results.
However, in food photography, the goal is a natural, yet vivid and authentic look that brings out the best in the subjects, and this is what Capture One gives us.
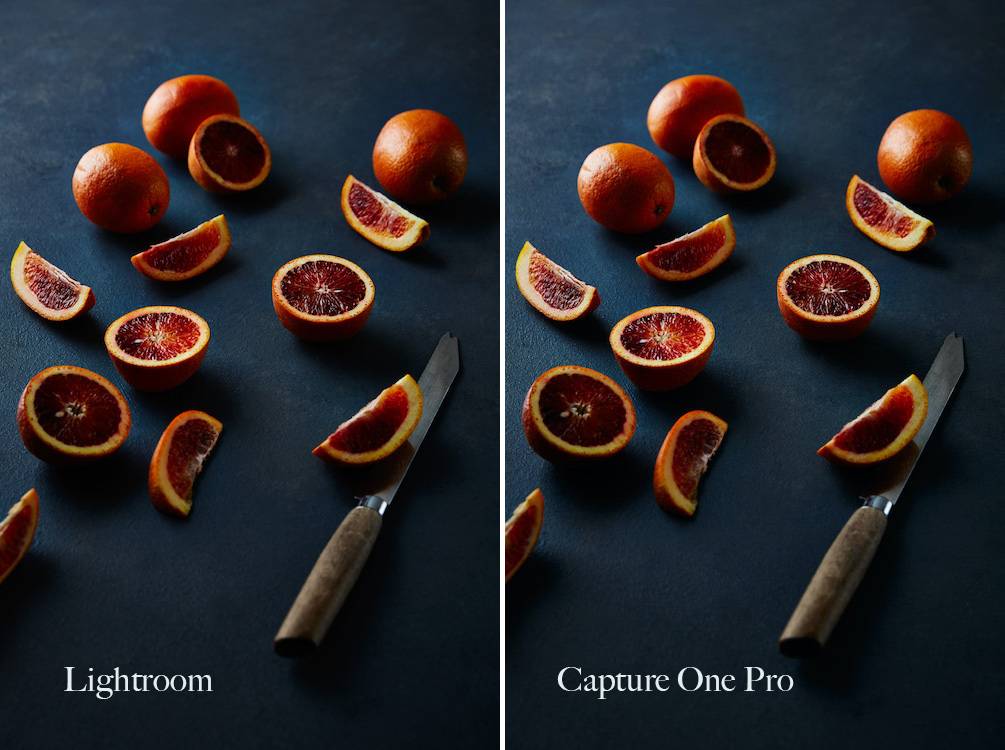
Here I have a still-life shot of some blood oranges. The shot on the left is processed in Lightroom and the shot on the right is processed in Capture One Pro.
You can see there is a noticeable difference in the way Capture One handles color and clarity out-of-the box when you compare your images side-by-side with those processed in another software.
The Capture One colors are a bit more punchy, brighter, and you can see the difference in the detail and sharpness, particularly in the flesh of the oranges.
Tethering Performance
Another stand-out feature of Capture One is its tethering performance.
Powerful tethered capture is something that draws many food photographers to Capture One, even if they continue to use another RAW editor.
When using Capture One for Tethering, you’ll notice that your images aren’t being saved on the SD card as is usually the case with other tethering software. This is basically making a copy of the image.
Capture One saves directly to your computer or external hard drive. This allows for tethering performance that is twice as fast. Capture One defines this as true tethered capture.
There are a number of tools that allow you to get the most out of your tethered capture session and increase efficiency in your workflow.
Once you have set up your Session folders and parameters for your shoot, you can create a template that you can use again again.
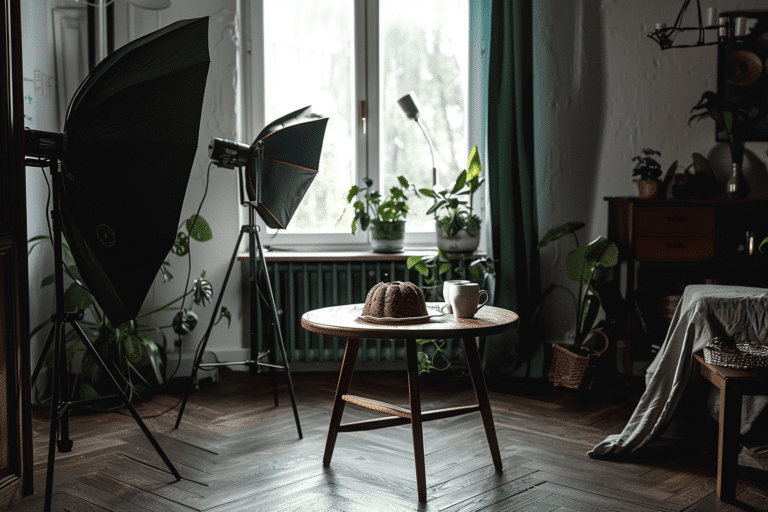
Capture One has a Live View function that allows you to light and compose your set in real time, which is very useful for scenarios that require precise compositions. You can also upload composition or other artwork overlays, which are commonly used on food product packaging shoots or magazine covers where placing subjects where they will interfere with text must be avoided.
A Customizable Workspace
When starting to work with Capture One, you’ll find it highly customizable.
Instead of different modules you have to switch between, it’s comprised of a single workspace with four main areas that you can set up to create your ideal workflow. Or you can have different workspaces for different workflows, such as a workspace customized for a tethered capture workflow, or a product photography workspace.
Capture One offers several tools that can be customized to suit your needs. The tools can be found in different areas of the workspace for easy access, but they can also be hidden, rearranged, or floated on the workspace itself.
You can create presets for single tools, and also apply and layer multiple adjustment presets via Styles.
Styles are the equivalent of Lightroom Develop presets that a low you to add or create a unique to apply to your photos.
In Capture One, a preset is defined as setting that are applied to one particular tool, so this difference in terminology and meaning are an important distinction to make.
File Management
With any RAW photo editor, file management is a key component.
A Catalog in Capture One functions like a Catalog in Lightroom.
in that it helps you organize large libraries of images; however, it offers more functionality.
Sessions are great for on-set shooting and tethered shooting in studio and are an efficient way to organize the images from a specific shoot.
If you work with agencies or clients that have in-house design or photo editors, you may not be the one responsible for retouching and will need to pass off RAW files, which you can do via Sessions.
You can further organize your photos without having to physically move them via Albums, which are like Lightroom Collections—Smart Albums, Projects or Groups.
This way you never have to struggle to find your best assets among thousands of image files.
Photoshop Style Layers
As a food photographers, local adjustment are your best friend.
With Capture One, you can do localized adjustments via powerful, Photoshop-style layers. Sometimes you want to adjust a certain color in one part of the photo, but not the same color in other areas. Or you may want to add contrast and clarity to. Specific part of the image.
Layers give you the ultimate control in the final results of your photo, and help you create clean and refined images with maximum impact.
To Sum Up
Capture One is such a powerful and robust program with so many functions a features that will help you get the best out of your photos.
Because of its outstanding tethering performance, color management, extensive tools ability to work in layers and, Capture One Pro is the ideal program for food photographers.
They also offer a 30-day free trial, which gives you lots of time to experiment with the program and see if its right for you.
Want to learn more about Capture One? Sign up for the waiting list for my program Capture One Deep Dive for Food Photography to get notified about when the course will be available and to receive special Capture one tips just for you.

